Getting Started with Oniric components
With Oniric, you can begin copying components immediately. You can keep using the Basic tier (free) to copy free assets, or upgrade to our Pro subscription here.
Use a supported browser such as Chrome, Firefox or Edge. Please note that Safari isn’t supported because of native browser clipboard constraints.
After copying, paste components straight onto the canvas of your Webflow designer project.
1 - Browse the Library
Explore the component catalog to find a component that fits your use case. We publish new components regularly, so check back often!

2 - Copy and paste the component
When you’ve picked a component, click on the “Copy for Webflow” button located just below "Step 1: Copy structure to Webflow". This copy the Webflow structure component on your clipboard, ready to drop directly into your project. Then, paste into the Webflow designer, within the "Body" layer of your page, with CTRL + V on Windows, or ⌘ + V on MacOs.

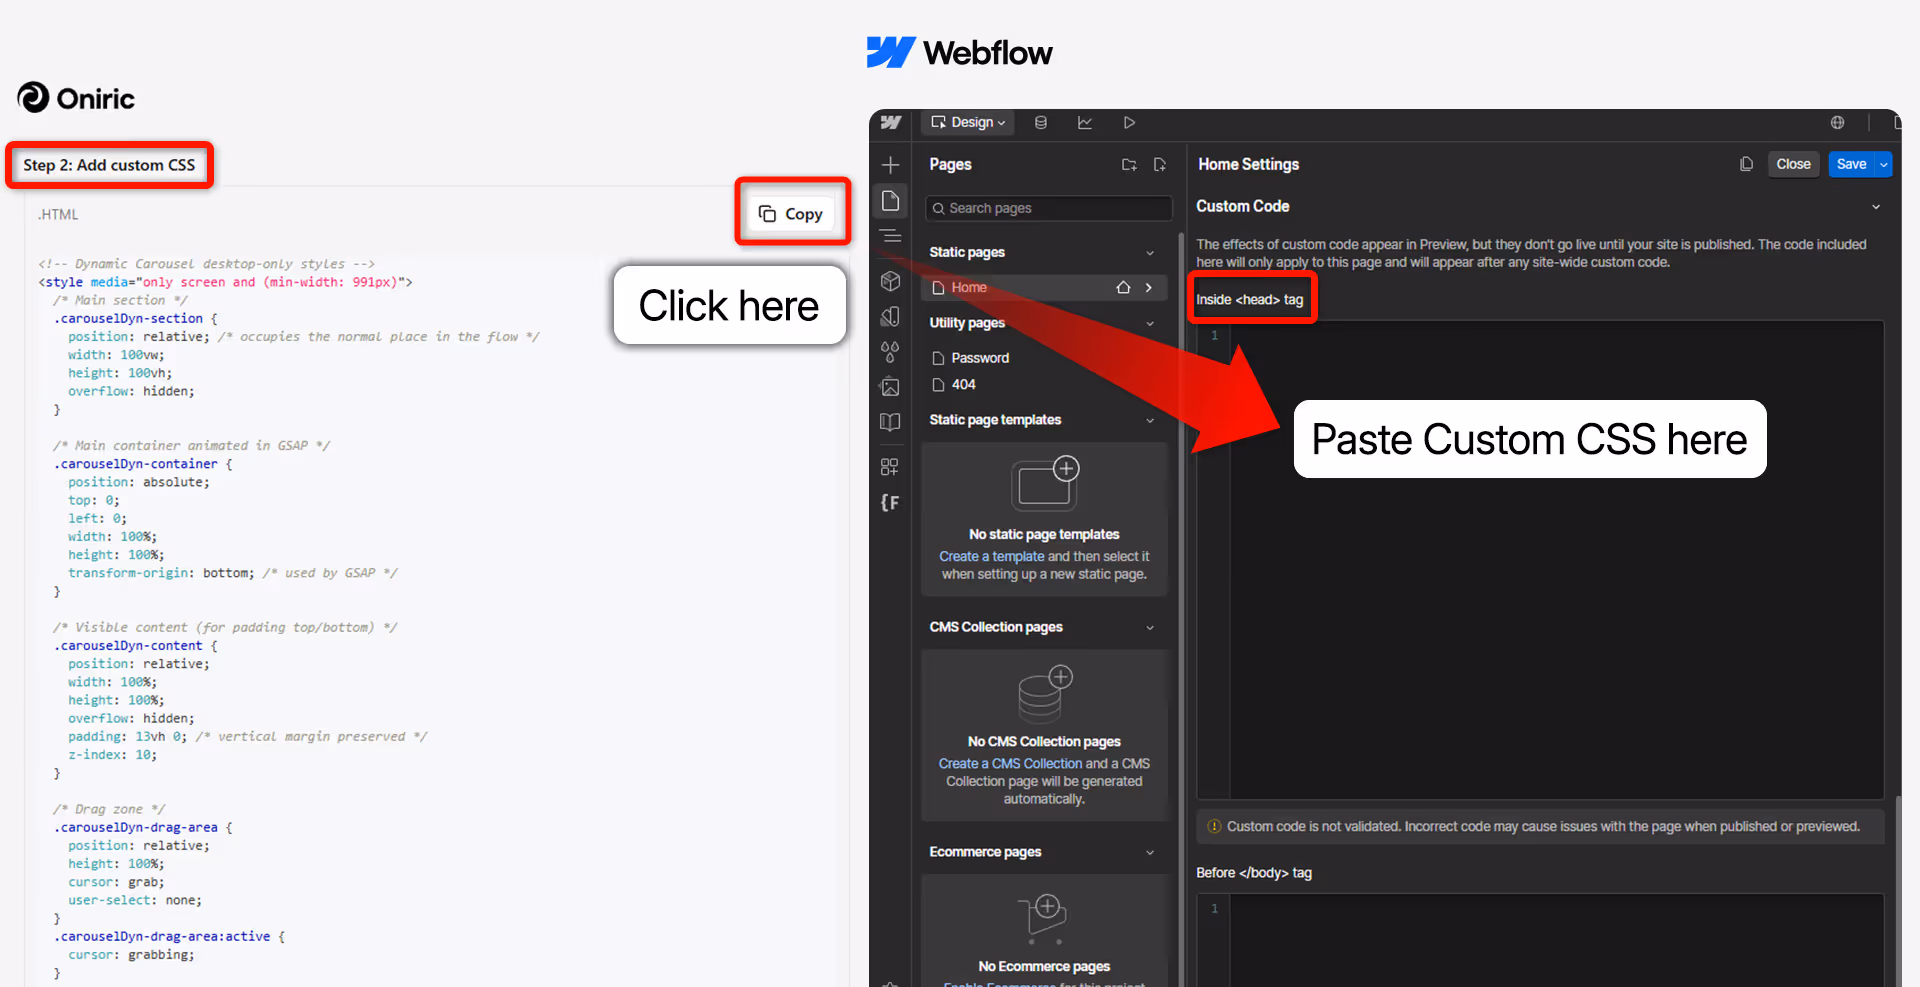
Most components also require adding CSS and JS code. If this is the case, for the CSS code, click on the “Copy” button located just below “Step 2: Add custom CSS.” Then, copy this code into the “Inside <head> tag” section of the “Custom code” section of your Webflow page settings. If your component is used on all pages of your website, you can choose to paste this code into the “Head code” section of the “Custom code” section of the global site settings instead.
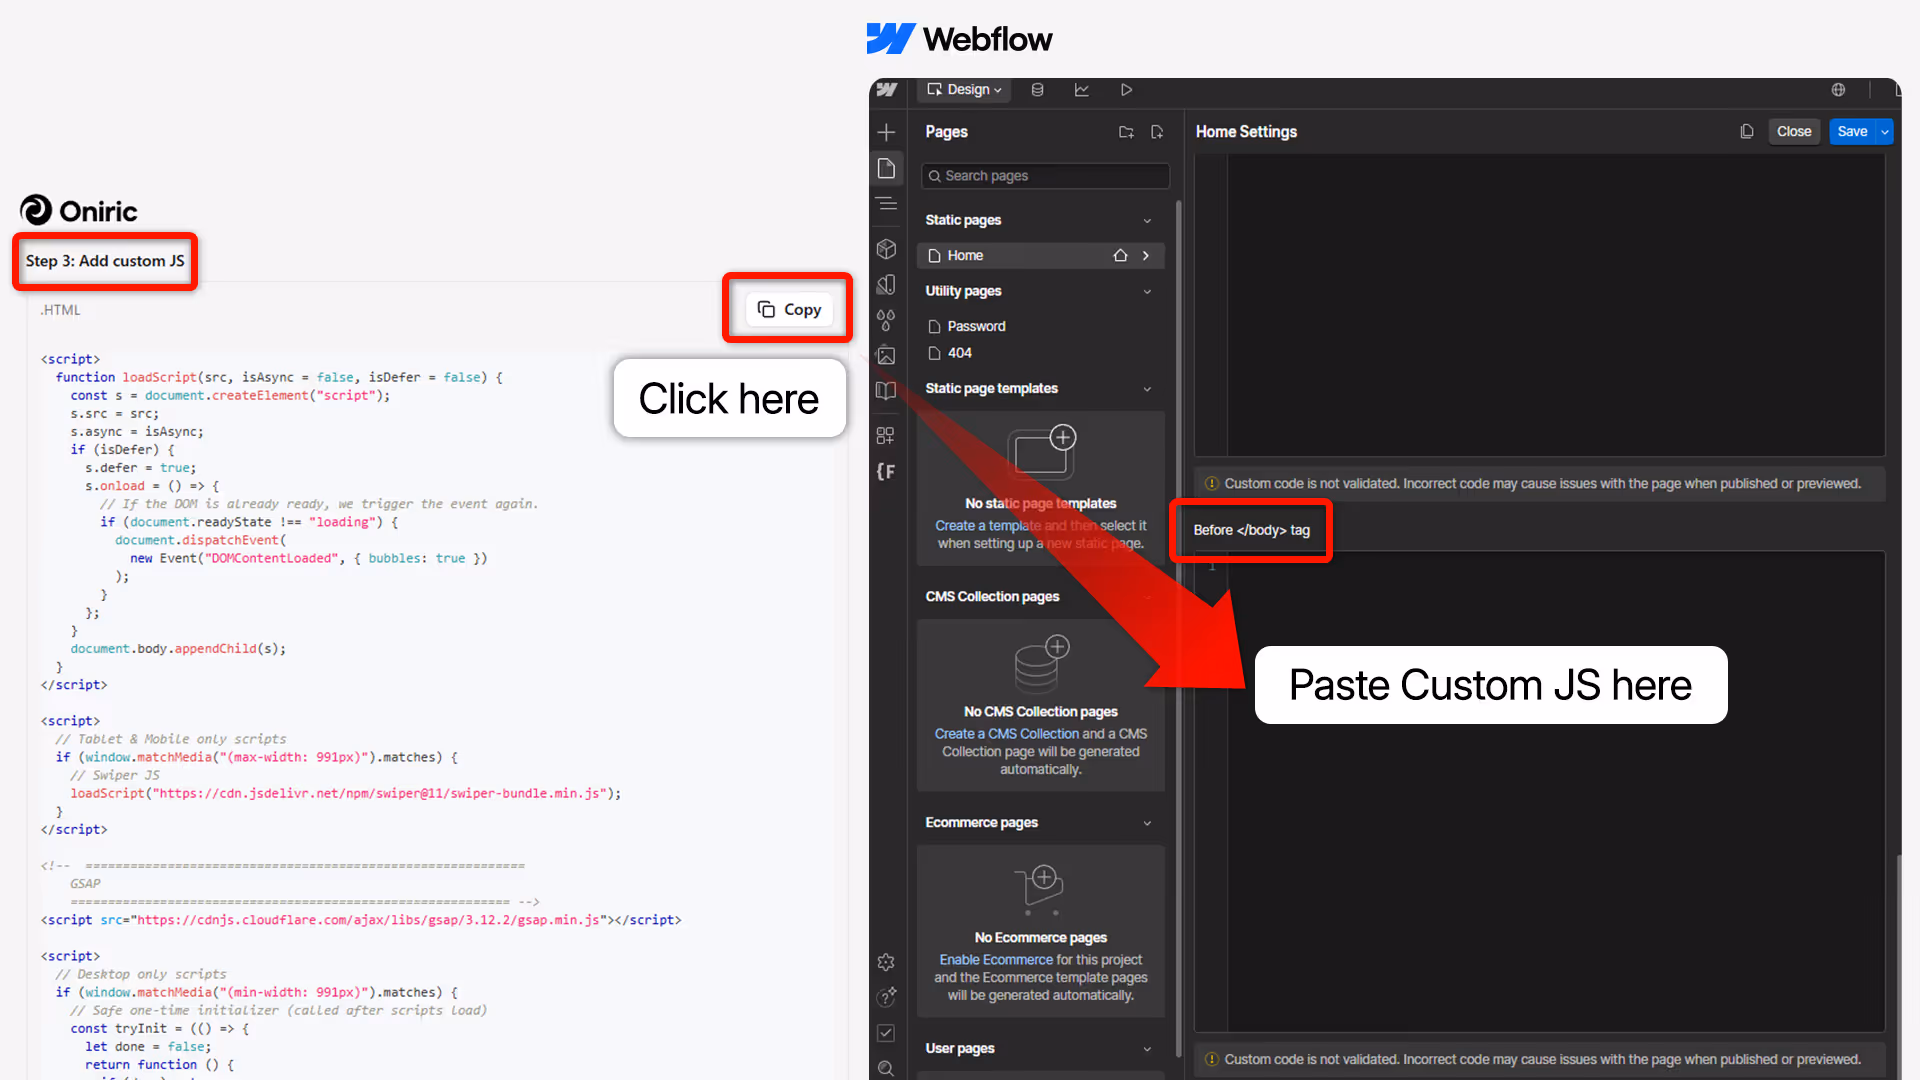
For the JS code, click on the “Copy” button located just below “Step 3: Add custom JS”. Then, copy this code into the “Before </body> tag” section of the “Custom code” section of your Webflow page settings. If your component is used on all pages of your website, you can choose to paste this code into the “Footer code” section of the “Custom code” section of the global site settings instead.
3 - Customize the component (basic)
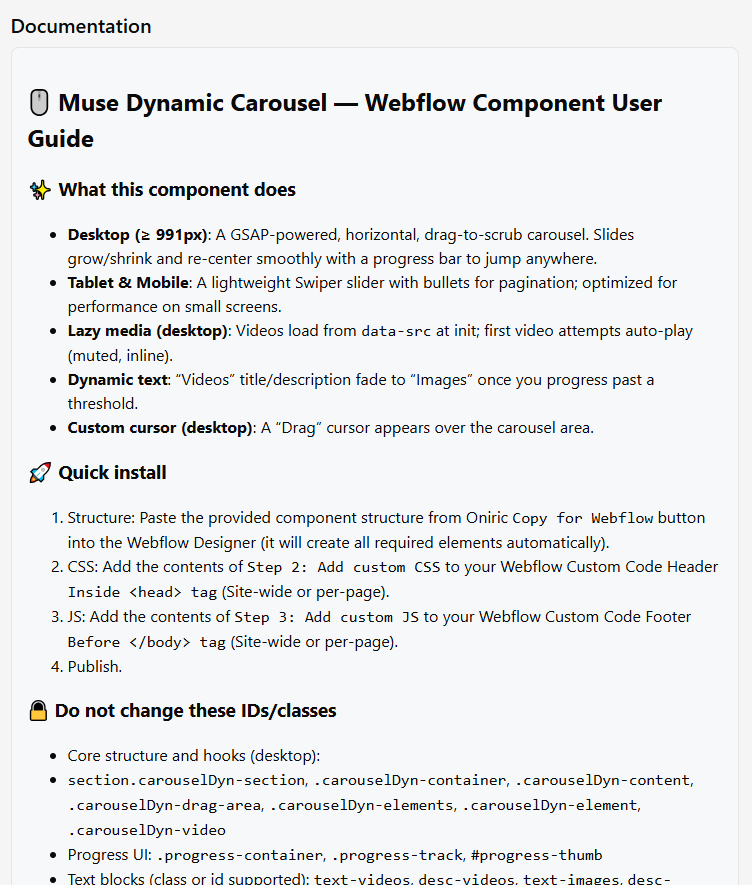
After copying the various elements of the component (Webflow structure, custom CSS and custom JS) into your Webflow project, you can start customizing the component to suit your needs. You can refer to the documentation provided for each component, located in the “Documentation” section, which offers useful tips.
In particular, the documentation mentions the component classes that you can freely modify, and the classes used by CSS and JS codes that should not be modified, as this could break the components. Of course, you still can modify the classes, IDs, and custom attributes used by CSS and JS scripts, but you will also need to update the scripts so that the classes remain referenced correctly.
4 - Customize the component (advanced)
Within the custom CSS and custom JS files, some external libraries (e.g., Swiper JS) or some other Oniric scripts can be imported (the latter are imported in the form <script src="https://XXX.cloudfront.net/[component-name]/scripts/[script].js"></script>).
If you want to customize an Oniric script in depth, you can copy the script URL into your browser to access it. You can then save the script's content locally on your computer with CTRL + S, edit it with the editor of your choice (VS Code, Cursor, etc.), and then either:
- copy the script's content with CTRL + C and paste it into Webflow in the same place as the custom JS code with CTRL + V
- or host it on your own CDN of your choice (Cloudflare, jsdelivr, AWS S3, etc.) and import it into Webflow in the same place as the custom JS code. For example, if your script is hosted on AWS S3 and accessible from a Cloudfront distribution, you will add <script src="https://[your Cloudfront domain].cloudfront.net/[path to your script]/[your script].js"></script>.
Once again, you can refer to the documentation provided on the component's page, which lists the most important values you can modify to thoroughly customize the component.
5 - Install class merging extension to avoid classes duplication in Wefblow
In Webflow, incoming classes that share names but differ in styles are duplicated on paste. Over time, this can bloat your class list with entries like “Section Large 5” or “Paragraph Regular 16,” making bulk updates a chore.
To keep things tidy, install the free xSync by xAtom Chrome extension that can be downloaded here. It merges matching incoming classes with existing ones in your project, preserving a clean, organized class structure.